DIY Onbu With Padded to Wrap Straps

Today’s project is my first onbu but my 11th diy carrier at this point. I am not a professional seamstress I do no sell my carriers. I have simply combined things I have found in other tutorials or other carriers to make this carrier. I am in no way responsible for the safety of your child while wearing this carrier.  Features of this carrier

  1. Padded to wrap straps
  2. Leg out padding
  3. Hood compartment
  4. Padded protector at waist ring

Most of my directions here are based off this tutorial – from the fine and fair blog http://www.fineandfairblog.com/2013/10/tablecloth-mei-tai-tutorial-with-wrap.html 1. I simply used the printable pattern and assembled as directed… and a 60″x84″ table cloth. I would recommend about 1/2 yard of canvas or duck fabric for this project as well 2. I cut out all of my parts.

  • 3 Main body pieces – (1 – canvas or duck fabric – 2 – table cloth fabric )
  • 2 straps – 15″ x 70″
  • 2 ring loops – 6″ x 8″
  • 2 – pieces hood flap  (not part of the pattern)
    • I traced the top curved edge of the pattern to create this piece. I then added about 3″ from the widest part to create the piece.
    • 20150418_135545
  • 4 – pieces to protect you from the rings
    • for this i traced the edge of my small sling ring I would then add 1/4″ to 1/2″ the width dimensions to allot for seam allowance. and add about 3″ to the length beyond the size of your sling ring. Mine were a little small this is the size I recommend based on experience. Final dimension should be width- sling ring size + 1/2″ x length sling ring size +3″) you will also want 2 pieces of fleece with the same dimensions
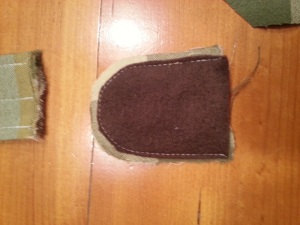
  • 20150416_124901
    • IF making a hood you will want to cut your hood and hood straps I haven’t made mine yet.
    • 6 -3.5″ x 12″ pieces of fleece

3. Once all your pieces are cut I then work on all the smaller pieces a) Ring Tie offs for waist – padded flap first

  1. Layers your materials – 1 layer face up, 1 layer face down, and then a layer of fleece
  2.  Stitch all layers together with an 1/4″ seam allowance
  3. Trim off excess fleece outside of the seam allowance – this is what it should look like
  4. 20150416_124901
  5.  Then flip so the fleece is on the inside and top stitch… set aside
  6. Now Grab your strap to attach the rings to the carrier 6″ x 8″
  7. I like to iron mine in thirds good side out
  8. Take the top third and fold it under about 1/2″ then iron down ( I forgot to take a picture of this step
  9. I then stitch the center seam down with a top stitch
  10. Top stitch the two long edges.
  11. Fold in half and place your ring on the strap you have just assembled
  12. I then Placed the ring with the strap on top of the curved piece you made before
  13. Sew the two pieces together with 3/4″” seam allowance from the rings then you can set this aside
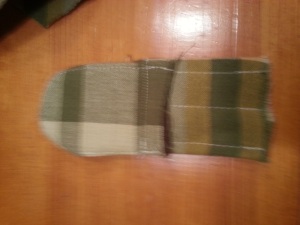
  14. 20150416_124906
  15. 20150416_124857

b. Assemble the Shoulder Straps

  1. Gather your straps 15″ x 70″ – I cut mine out of both sides of the table cloth so I only needed to hem one edge
  2. Iron/Pin a 1/2 in seam  – I like to iron 1/2″ fold using the edge of that 1/2″ for my guide then iron again and pin.
  3. Top Stitch the seam you just ironed – I like to use longer straight stitch for this
  4. Repeat this step for your second strap
  5. 20150418_122216
  6. Stack 3 of your 3.5″ x 12″ pieces of fleece on top of one another
  7. Zig zag stitch along all 4 sides. I like to run done one long side – then do the other long side running stitches in the same direction. Then I stitch both short ends.
  8. Repeat this for the other 3 pieces of fleece
  9. 20150418_123022
  10. Mark on your strap from raw edge 5″ with a non permanent marker
  11. Place padding on your strap starting at your mark
  12. 20150418_123136
  13. Line up fleece within 1/4″ of the hemmed edge
  14. Fold strap over fleece pad
  15. 20150418_123607
  16. Make sure that the strap edge goes over the fleece so when you stitch you do not see the fleece. With 3.5″ pieces of fleece your hem should be about 3.75″ from the fold Pin in place.
  17. Stitch the fleece into the strap I started on one short end, then top stiched the hem covering the padding, then along the other short end. you can stitch right on the edge of the fleece.on the short ends.20150418_124305
  18. Add a few rows of stitching length wise down the padding area I did two rows with an inch between them at the center of the padding
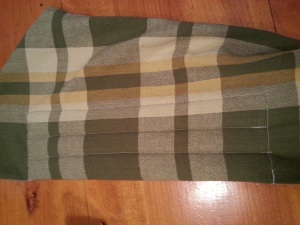
  19. 20150418_124652
  20. Fold the remaining wrap strap into two overlapping pleats
  21. 20150418_125149
  22. Pin into place and stitch down 1/2″ from the bottom of the padding (toward the raw edge of the strap)

c. Assembling the Body Panel and All Straps 20150418_131553
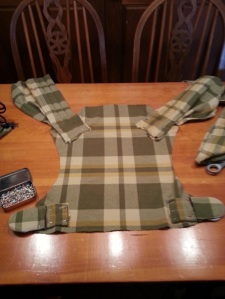
  1. pick up your center panel This is the panel you will be attaching all your straps to. (I suggest using a canvas or duck fabric for this layer)
  2. Using a ruler I mark 1/2″ from each edge where the straps meet the panel  and a 1/2″ from both edges of the srap opening
  3. Start with your waist ring assembly – Lay assembly on top of panel ring side down and padded cover up.
  4. I used the line to stitch both piece together with as my guide… line up that stitch with your 1/2″ guide line and keep the length of the assembly 1/2″ from he bottom edge of the carrier. Pin into place
  5. Repeat for the second assembly
  6. Lay straps out on panel . Pleats should be under the padding and padding should be toward the inside of your carrier. Please see the above image if that doesn’t make sense.
  7. I like to make sure I have 1/2″ of free material on each side of the strap when placing my strap. You could also use a ruler to draw the strap angle before putting it into place.
  8. Use the guide line from tacking down your pleats. Line this up 1/2″ away from the edge of the carrier.Pin into place
  9. Repeat for the other strap
  10. Time to do lots of stitching. If it makes it easier for you you can draw your x boxes and stitching lines onto the carrier before you move it to the machine.
  11. 20150418_135205 20150418_135209 20150418_135213
  12. I do a little extra seaming then necessary a better safe then sorry situation. I like to keep all of the strap stitching about 1″ from the outer edge of the carrier to make it easier for later
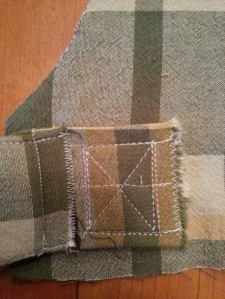
  13. Waist Straps –  I did about a 1.5″ x box  I used a triple straight stitch for my x box. I did a zig zag stitch to secure the spot where the twp pieces meet yours will be in a different spot because I gave you better dimensions then I made with my own. I also did a zig zag stitch to finish off the raw ends of the fabric.  (see the middle image above) Repeat for the second Waist strap
  14. Shoulder Straps  – Sew an X box stitch mine is about 1.5″ tall using my triple stitch again, About 1/2″ down from the x-box I sewed a straight triple stitch then sewed over that with a zig zag stitch, Then finish off the raw fabric again with a zig zag stitch. See picture on the right. Then repeat for the second strap.

d. Hood Flap

  1. Place both pieces together right side to right side
  2. Stitch using a 1/2″ seam allowance all the way around leaving a big enough space on the flat edge to get your hand inside.
  3. 20150418_135545
  4. Turn the fabric tube so stitching is now on the inside.
  5. Top stitch along the two short side and also the curved side
  6. IF you want to hide your kam snaps now would be the time to hide them.
  7. Mark 3 locations for KAM snaps (right left center) I like to put mine in at least 1/2 from the edge
  8. Note I did not hide mine so this is what it looks like stitched onto the carrier below
  9. 20150418_212742
  10. Use an awl to poke a hole through one side of the fabric.
  11. Insert the pin for the Kam snap into the fabric and and assemble cam snap as normal I put the male side of my snaps on this piece and the female on the panel itself.
  12. Top stitch the remaining side closed.
  13. Grab your carrier panel that will go against baby
  14. Line up Hood flap 1/2″ from the top edge of the panel. (I Apologize I did not take a photo of this step)
  15. Pin into place
  16. Sew to panel by stitching along the long flat edge only.
  17. Flip flap down and pin to panel so you don’t accidentally sew it down later
  18. Will look like the below picture but not with the rest of the carrier
  19. 20150418_142146

d. Assembling all the body layers

  1.  Lay Inner Panel down on table with straps on top
  2. 20150418_135205
  3. Lay outer panel on top face up
  4. Lay inner panel with hoop flap on top face down
  5. pin into place make sure you have all three layers lined up
  6. Using your ruler again mark 1/2″ from the edge where all your straps attach
  7. Stitch with 1/2″ seam allowance around all 4 sides. Leave about a 6″ opening in the base of the carrier to turn fabric later. Stop stitching 1/2″ from strap and resume 1/2″ after strap as you go around
  8. 20150418_141712
  9. Turn the carrier inside right. I like to start by moving my straps to the inside of the envelope through the strap opening. You want to insert then through your two exterior layers. Once the shoulder straps have been flipped I simply pull both straps through the bottom opening and the remaining carrier follows it right out.
  10. Once carrier is turned pull the remaining straps through the strap openings to ensure all straps are now on the outside of the turned fabric.
  11. 20150418_142146
  12. Press all your seams with an iron When you get to where the straps meet the carrier I like to draw a line 1/2″ from the edge on both side so I know exactly at what point to fold the fabric over so it lines up for top stitching. I fold the inner layer right over at the stitching as well  (sorry I did not take a picture of this)

e. Leg out padding

  1. Hand draw a curved line from about 2/3 of the way up the panel to the bottom of the carrier (in hindsight i would old do it to about 1/2″ from the top of your waist straps)
  2. Use a long straight stitch to stitch along your curved line make sure to leave an opening at the bottom to fill with padding.
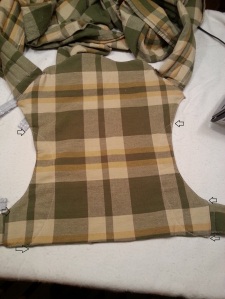
  3. 20150418_210937
  4. Then top stitch around the outside from the top of the waist band to the top of the waist band (this gives you the option to fill your leg out padding from the waist band or your 6″ opening which ever you prefer. ( do not flip up the hood flap yet so you don’t accidentally sew it shut.
  5. Fill your leg out padding ( I like to use small clumps at a time and use a pencil to help guide it to the top of the leg out padding ) I made mine med to firm as far as fullness goes.  If you went all the way to the bottom of the carrier like i did you will need to fill from the waist strap opening and if you did not you have the option of filling from the bottom opening or the waist strap opening.
  6. If you did not run leg out paddingto the bottom of the carrier sew a closing line of stitches 1/2″ above the waist strap .  If like me you ran your leg out padding to the bottom of the carrier top stitch from the existing top stitch above the waist strap to the corner and to the end of the leg out padding. I like to leave a little big of wiggle room in my padding so i can shove it inside to make sewing easy the work it back out afterwards.

f. Finishing off the carrier.

  1. Remove pins from hood flap.
  2. Using the Kam snaps already attached line up where you need to put the other half of the snap.
  3. Using your awl poke a hole through the inner layer ( you could go through all three if you want to see the snaps heads on the outside of the carrier but I did not.
  4. Attach Kam Snaps
  5. Repeat for all three snaps.
  6. 20150418_212803
  7. Once cam snaps are attached stitch the sides of hood flap to the carrier. (you can see the stitching in the above image)
  8. Once your Kam snaps are inserted Top stitch close the remaining portion of the bottom edge of your carrier between the waist straps.
  9. At this point you can quilt your waist band for decoration or added strength.
  10. If not you are all DONE.

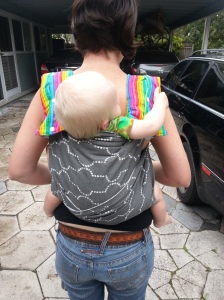
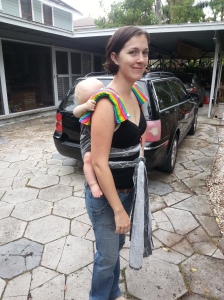
Carrier Laid Flat  Front of carrier 20150418_214807 Showing Straps through rings Front of carrier 20150418_214919 Showing Straps through rings inside of carrier 20150418_214949 Action Shots 20150419_101137 20150419_101147 20150419_101205 20150419_101700 Hope you all enjoyed this tutorial. I can’t wait to see all your creations.

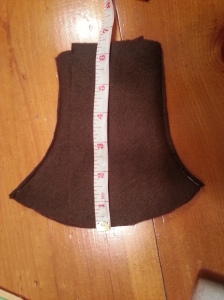
Suck Pads Part Two: Bell shaped padded suck pads for wrap strap mei tai

Previously I posted How to make bell shaped suck pads. This is my post showing the first set I made no padding suck pads https://craftycincin.wordpress.com/2015/03/14/corner-suck-pads/. Please Check out Katie’s KPs tutorial here I used this as my base for this project.–> http://katieskps.blogspot.com/2015/02/corner-drool-pad-tutorial.html

My Inspiration for the project is the stack of fabric I have sitting aside to make so many different type of buckle padded carriers. I wanted an easy way to test out whether or not I liked the padding. I also find myself thinking once in a while that it would be nice to have padded straps on my mei tai when I do back carriers. However, I did not want to make a third mei tai carrier so I thought why not make a slip on padding for the occasion that I would prefer an ergo ish feel instead of a wrap strap feel. So I started with the same pattern in my previous post. However, when I sewed it Instead of using 1/4″ seam allowance I used 3/4.”  because the suck pads in the previous size just fall off my straps while trying to put the baby on.

Materials :

1 yard fabric for outer layers ( I used quilters cotton )

3/4 to 1 yard fleece (you could use less if you do it the way I did it instead of the way I suggested that may make the process easier.)

1″ nu foam padding

10 Pairs of Kam Snaps

1. To start with I laid out my pattern and traced the bell shape. I then increased the length of the pattern using a straight ruler to 16″ from the bottom of the bell to the top of the suck pad. I forgot to take a picture of this step but if you need it let me know and I will make one. Each layer of the pattern is three pieces. a full bell shape and two pieces that are about 2/3 of the bell shape. You will need 4 sets (two inner layers and two outer layers) of these made from your outer fabrics make sure you cut them all the same or they will not line up (don’t flip your pattern upside down or cut one on the wrong side of the fabric and one on the right side).

2. You will also need 2 sets of what you are using for absorbent material. I cut mine kind of funky you could also cut your absorbent material the same way as your inner and outer layers then sew the padding to it instead of the sleeve I did.  I cut my bell shape out the same as the pattern but cut it a little short at 6.5″

20150323_001026

Once those pieces are cut I cut my piece to make a sleeve for the nu foam padding I cut two pieces at 11.5″ x 8.5″

20150323_001012

3. Cut your padding Mine was 2.5″ x  9″

4. Sew all the sets of fabric inner outer and middle layers following the previous mentioned tutorial. I used  3/4″ seam allowance because I wanted my strap to fit snug and the pattern is for KP straps.

5. Take the fleece square and fold in half making it 11.5″ x 4.25″ Insert padding into the fold I left about an inch from padding to the top to make sure my sewing machine had plenty fabric to grip. I then pinned the fabric snugly around the padding. Using the zipper foot on my machine I straight stitched across the top and then down the one open long side of the fabric. this created the sleeve. I then ran one straight stitch with the longest stitch I had down the center of the padding so it did not roll or shift inside my tube. trim off excess  as close to stitching as you feel comfortable. along your stitched edges. DO not trim off the open end.

6. I then Lined up the padded sleeve with the absorbent bell shape. Centering it on the center panel and not overlapping the padding area. You should have 1″ to sew to the bell shape. I simply sewed a box to attach each foam pad to the fleece bottom bell.

20150323_003533

7. Sew all your other pieces together following the original tutorial

8. Assemble your Suck pads by layering the fabrics … outer layer right side up, outer layer right side down… fleece layer with padding. Take special care to pin the curve shapes matching. You can see this step in the original tutorial.

9. Sew all pieces together using a 1/4″ seam allowance. Leave enough space to turn the materials and fit the padding through. I left open top center in my case from seam to seam.

20150323_012025

10. Turn fabric inside right and press seams.

11. Top stitch around the entire shape take special care to make sure you line up your opening. I Folded one layer over the top of my padding and then matched that seam to the other layer so that the fleece was caught in the top stitching to prevent slippage. when you are done they should look like this but taller.

20150313_221419

12. Once all that was done I set both suck pads on top of each other and punched holes for my kam snaps using an ice pick. I punched through both suck pads at the same time to make sure my snaps were in the same location on each suck pad. The center of my Kam snaps is about 1/2″ from the edge of my fabric. I Put 5 Kam snaps on each suck pad.

13. Snap together and then you are ready to go.

“Final Size 16.5’h x 4.5″W on the straight area x 6.5″ at the widest part of the bell.”

I did not want snaps against my skin So snaps face away from your body when you put these straps on your carrier. Mine are reversible so there is nothing holding it to the carrier. IF you did not want them reversible you could put a cam snap where the bell meets your carrier and easily snap it into place so it doesn’t move while putting baby into carrier. Also my insertion point where my wrap straps meet my carrier is 3.5″ wide which is why my pads were made to this size if yours are wider or narrower your could adjust accordingly.

20150323_02193120150323_022400

This is the first use of the padded straps. They will take some getting used to I didn’t quite pull my straps tight enough when I tightened my carrier because I could not feel the pressure. They are very comfy I am impressed by the cushyness of the simple nu foam 1″ padding.

20150323_111736 20150323_111658

Edit: I wore them today with baby in a front carry. It was very comfy with the exception that I tried to spread my wrap straps and seems I tightened one spot more then another and created a pressure point. I will try again and get pictures. I do however suggest next time I will tighten my strap section by section more like a wrap less like a mei tai to prevent the same issue from occurring.

Tank Hack for Nursing Bras

Let me preface this post with….. If I had known this trick I would have been wearing nursing bras before I even had a baby. All these years I have loved the layered tank look, however it is not in my mental style to be able to successfully do it. But now that I’m nursing life is so different. I am one of those I don’t care if you see my sports bra kind of people. So, needless to say when I found this tutorial on pinterest I thought, “this is genius!”

Tonight’s “I should be in bed because the baby is sleeping and I’m tired craft.” Converting a tank top into an easy nursing top. Requirements …

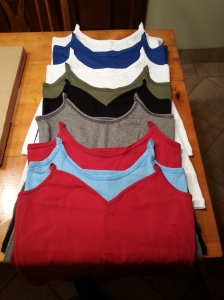
Doubled my tank top collection tonight. Please note the first time I did this I hand sewed to hide the stitching. This time I was lazy I used my machine and just sewed a straight line across. I did three rows of stitching (forward, reverse, forward) straight stitch. I didn’t even change my thread color except when I switched from white to black. I used black on everything but the white tanks.

20150321_223757 20150321_223902 20150321_223912 20150321_223944

Note if you prefer the two shirt nursing practice… pull one shirt up and pull the other down. This is a great way to wear a tank top underneath without having to mess with three layers. This can be worn with any nursing bra.  I just prefer no over shirt so the sports bra gives it more the double layered tank look versus my other bras make me look trashy in my opinion cause they look like bras and hang out.

To put the tank on simply put your bra on. Un-snap the nursing clip. Slide the loop onto the female side of the nursing clip (the part that is connected to the bra cup.) re-clip the bra. Repeat for the other side and you are good to go.

Most of the time when I nurse like this I simply un-clip the bra and nurse away then when baby is done the tank is usually still attached to the bra so I just re-clip and we are done. It is so very convenient when you have a baby in a carrier on your chest hungry not to have to fumble with multiple items of clothing.

Reversible Corner Suck Pads

Today’s project… Reversible suck pads for my mei tai with wrap straps.

Not wanting to buy a pattern I searched the internet to make sure I understood exactly how to make what I wanted. Well on that search I found a wonderful tutorial. It in fact told me what I was thinking was exactly right. Please feel free to jump over to her blog to see the how to for making these wonderful suck pads. Please keep in mind that the pattern is for kinderpacks specifically and they are wider then your average carrier. In my case I thought that may be useful to leave them wide seeing that my mei tai has wrap straps. I am hoping to both protect my carrier from Theodore’s one tooth and his drool and also not affect the function of my straps that I love.

Please Check out Katie’s KPs tutorial here –> http://katieskps.blogspot.com/2015/02/corner-drool-pad-tutorial.html

So I’m not going to lie I did the old read the tutorial through once and see how many details I remember as I went along. I also had a few bad sewer moments like forgetting how to use a pattern. I got all excited I cut all my pieces out only to notice I only cut enough for one suck pad, needless to say I went back to cutting. I then went to assemble my pieces only to realize that I must have flipped my pattern at some point or cut on the wrong side of fabric instead of the right or vice versa because one of my panels was backwards. Back I went to cutting. But after all that they came out beautiful.

All done one pair of reversible curved suck pads. One side is rainbow and the other is dinosaurs. I used a very lightweight terry cloth on the inside (I believe it was french terry) I do hope it is absorbent enough but only time will tell. Both of the outer layers are made of quilter’s cotton. And I used three KAM snaps on each for easy on off removal for any carrier.  If I remember I will update with action shots however the baby is asleep and no one wakes the sleeping baby.

20150313_221343  20150313_22150320150313_221457

Wedding Crafts

I’d say my I can make that phase started with my wedding. So I guess we can continue this journey there. I had a relatively small budget for my wedding but that wasn’t going to stop me from having some amazing details. Starting with designing all of my own graphics. I then incorporated those graphics through my entire wedding.

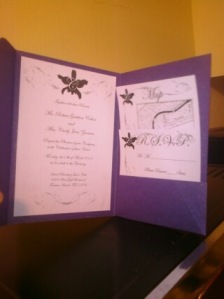
Invitations were a Pocket fold style with a belly band.

CIMG0157 1328130646262imagejpeg_2

My husband was very help full in assembling them all including the belly bands considering I was scoring all the paper with one leg up on a chair in a cast due to a broken ankle. The pocket folds were made by hand all the paper ordered from cardsandpockets.com. All the graphics I made with my relatively limited skills at photo shop and lots of Google references for wording and layout ideas. I even downloaded an image of an orchid and hand drew the outline with magnetic lasso to edit it and create my lovely silhouette. Initially this silhouette was only supposed to be for the invitations, but since I had worked on it so much it went on everything. You will see this later. Being on such a budget I printed all the invitations myself on my dads laser printer. (yay, he paid for ink)

There were so many little projects I just kept adding them. I decided for a few bucks these would be really cute. Enter Tears of joy packets. All packaged in a pimped basket from Joann Fabrics.

Tears of Joy: Simply a waxed paper like envelope with two tissues inside and a belly band made from my invitation scraps.

The sign is simply printed on cardstock on one side and backed by a piece of cardstock the same size. I sprayed spray adhesive to one piece placed bamboo skewer inside sprayed the second side then pressed together. Then I used my punch to round all four corners.

For the basket I simply bought a basket I liked and wove my ribbon around the edge one strand one direction and one strand the other direction. I made sure they crossed in the front of the basket every time. The ribbon was simply made my making 4 fabric loops and overlaying offsetting each loop from the other to create a flower form. I then glued long ribbons to the back and hot glued an old hair accessory I had to jazz it a bit.

CIMG0159DSC_0428OLYMPUS DIGITAL CAMERA

Since we were having a beach wedding in March and live in Florida we never know how the weather is. So wedding programs became triple purposed. First, they were a wedding program on one side. Second, they were a photo I-spy. There were two different versions as well to avoid 60 images of bride and groom kissing, and whatever else I put on there. Third, they were a fan. Turned out the day was beautiful. However they were used as visors for many due to daylight savings and a late start.

These were simply designed in word printed onto a sheet of card stock. Using my scoring board I put a perfect seam in each program. Then I folded on scored line and pressed the seam. I then used a rounded corner punch to round all four corners. I ordered paddle sticks from saveoncrafts.com (if i remember correctly) maybe ebay. I then painted each stick silver. Once the sticks dried I used spray adhesive in the yard sprayed programs one at a time. Make sure to follow directions on spray adhesive for permanent adhesion. Spray then insert stick then press closed. then I let them all dry until the wedding day. It’s been almost 3 years and the few i have of these are still stick together

OLYMPUS DIGITAL CAMERA OLYMPUS DIGITAL CAMERA

Since it was a beach wedding we were limited to the things we could use to throw at the bride and groom. No bird seed, nothing artificial, no flower petals unless I wanted to clean them. Wedding was before sunset so no sparklers and I hate bubbles. So Instead I made ribbon wants for each guest to wave as we were announced husband and wife and walked down the aisle as husband and wife for the first time. At the wedding a paddle and a wand were given to each guest by our greeter who explained when to use them.

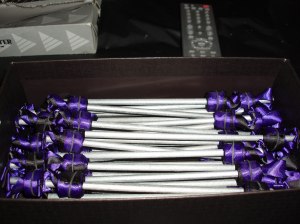
Wands: I bought 1/4′ dowels and cut them to 12″ each. I then painted each dowel silver. I then used a standard thumb tack (the ones you hold between your fingers not the silver pushpin style) to pre make my hole in the top of each stick. I then trimmed all my ribbon in my case I used 3 strand of 18″ length in hide sight I would used 24″- 32″ if I were to do this again. I then burned the edges of all my ribbon. I simply lit a tall tapered candle in a candle holder and passed the end of each ribbon over it. (Stops fraying) then I pulled out my hot glue gun and got to work. I layered three ribbons for each wand onto a silver push pin. I folded over about 1/2″ then put it on the tack to give me pretty edges at the top. I then hot glued the whole assembly onto the stick with the hot glue gun. Make sure to press the tack in solidly. Then I let them set and cool over night. The next day I gently rolled each ribbon wand up and put a small rubber band ( the kind for tiny braids or braces ) around the end of each wand for easy storage.

 OLYMPUS DIGITAL CAMERA OLYMPUS DIGITAL CAMERA

Even my Aisle was hand made. My dad cut me down some bamboo from a friends yard it was then cut into several 5′ poles and 2 8′ Poles and buried 1′ into the ground. We then simply tied 6″ wide strips of tulle to each short pole. For the 8″ pole we tied white tulle to the top of each pole and had enough to run most of the way down each pole and then added some purple for effect. there are also orchids stashed in the billowed section.

DSC_0133

I had nothing blue for my wedding so I swapped my laces for simple baby blue ribbon. To my sandals I simply glued little blue bows to the sides.

OLYMPUS DIGITAL CAMERA OLYMPUS DIGITAL CAMERA

For the flower girls I made simple head wreaths with ribbons running down the back.

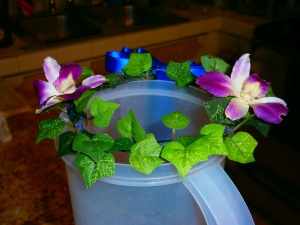
Wreaths: I used floral wire from Michaels as the. I wrapped the base with vines of ivy also from Michaels. I then glued on a couple of preserved orchids I purchased from Saveoncrafts.com. Then I wrapped the whole base with green floral tape. I made a simple bow by layering different size ribbon loops then added two pairs of cascading ribbons down the back I glued these to where the joining of the base wire was for a little more stability. Topped off the ribbons with a small heart shaped bead.

 OLYMPUS DIGITAL CAMERA OLYMPUS DIGITAL CAMERA

But enough of the wedding onto the RECEPTION.

Centerpieces were made from a tutorial I found online by searching for orchid centerpieces. Using preserved orchids I was able to create these before my wedding and not worry about any water. They had the illusion of floating orchids in water. I followed this tutorial http://bios.weddingbee.com/topic/diy-preserved-orchid-centerpieces/

OLYMPUS DIGITAL CAMERAOLYMPUS DIGITAL CAMERA

Remember that monogram I made. Well I ordered a customer stamp made with it, our names, and our wedding date. I stamped every napkin in the house with that thing and some stamp on ink. Including the cheap bar napkins. We did a buffet style meal so there were no plates on the table so we used these high quality paper napkins to create each place setting. I also used those extra belly bands for my invitations as napkin rings.
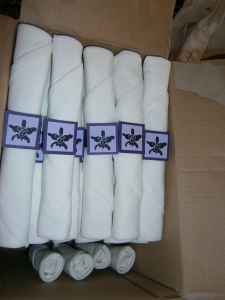
DSC_0403OLYMPUS DIGITAL CAMERADSC_0405

My Hubby worked for a restaurant that had just changed all their wine glasses to a different style so he brought me home enough to use them as an awesome favor for our wedding. Each guest went home with a wine glass a hand full of milk and dark chocolate kisses wrapped in tulle of course. Just to make sure each guest knew the wine glass was the favor I also made little wine glass tags that had purple beads and a thank you tag on each made from the wire hoop earings you buy in a craft store the ones that are about 1″ wide.

OLYMPUS DIGITAL CAMERA

We had so many friends who were vendors at our wedding. The bar tender, the caterer, the band, the florist what an amazing blessing that was. To say thank you we made them their own table with lots of kisses all dressed up.

OLYMPUS DIGITAL CAMERA

When guests entered instead of having them sign the cheapest guest book I could find. I simply bought the cheapest one and a fabric quarter from joann’s I then covered the outer panel of the guest book with the fabric glued some purple ribbon and a pretty button to it and abra cadabra awesome guest book. I then took their cheap pen and cut the tip off and inserted a purple feather received at my wedding shower and some purple ribbon.

OLYMPUS DIGITAL CAMERA OLYMPUS DIGITAL CAMERA

For the cake cutters I simply bought some very simple cake cutters as I would only be using them once. I wrapped the handles with black and purple ribbon. I used adhesive dots to hold it on there. I then used another dot to hold the simple bead on to the top area. Now I use them in my kitchen at every holiday sans the ribbon.

OLYMPUS DIGITAL CAMERA

Being that we had no water glasses and no metal silverware I wanted to have a way for the room to make us kiss. I bought kissing bells from michael’s. They come with the cute poem card and a gold ribbon. I wanted them to match my colors so I removed them and simply added a black loop and glued on a purple bow.

OLYMPUS DIGITAL CAMERA

All these things were a lot of work but it was all those little details that made my wedding so wonderful to me. I had everything exactly the way I wanted. To go along with all those hand made details I was gifted my amazing fingerprint tree drawn by a good friend of mine. DSC_0425

DSC_0289

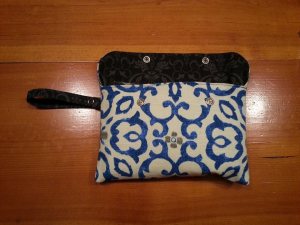
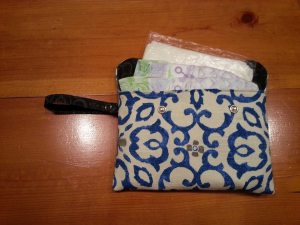
Diaper Clutch Bag Tutorial

Diaper Clutch Bag Tutorial

Materials –
Outer panel 9.5 x 13.5 (I used canvas or upholstery fabric for rigidity)
Inner Panel 9.5 x 13.5 (I used quilters cotton)
Strap 2” x 9.5” (inner panel fabric)
Interfacing (I used the heat bonded sewable interfacing from Joannes)
Cup or bowl to make rounded corners
Marking tool.
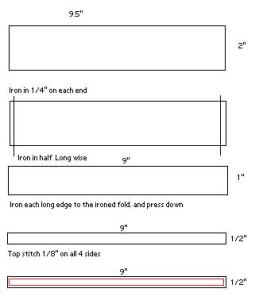
Strap Prep


1) Cut strap fabric to 2” x 9.5” ( follow graphic)

strapClutch Body


1) Pre-wash all fabrics
2) Cut 1 piece outer panel to 9.5 x 13.5
3) Cut 1 piece Inner panel to 9.5 x 13.5
4) Cut 1 piece interfacing 9.5 x 13.5
5) Bond interfacing to bad side of inner panel fabric following interfacing directions
6) Layer materials
a. Outer panel good side (pattern) up
b. Inner panel good side down interfacing up
7) Place rounded corner tool on each corner and trace desired rounded corner shape on top two corners. Cut off square corners using your template.

rounded corner step

8) Pin fabrics
9) Sew ¼” Hem on all sides leaving an inch to two inches unstitched to flip the fabric I do this on the short end opposite the rounded corners.
10) Flip your fabric inside right
11) Press with iron be sure to press your unstitched 2” section properly to look as if it were sewn with the rest.
12) Top Stitch 1/8” small end without rounded corners (Bottom)

first top stitch

13) Fold fabric so outer panel folds to outer panel. I folded up 5.5”

fold to this line
14) Press flat
15) Tuck one end of strap in between layers of pocket excess of strap to inside of the fold ( I like mine near the opening but you could put it near the bottom if you preferred
16) Sew 5.5” pocket on both short ends (you should be sewing looking at inner fabric) I used an 1/8” seam allowance with a straight stitch but your could use ¼” if that is more comfortable for you.
17) Flip right side out and attach closure snaps to flap and also to strap.
a. For strap I folded in half and put snap ½” – ¾” from end and about same distance from the bag as well
b. For the flap on the pocket mine are recessed about 1” from the top edge and 2.5” from each side (I used two
c. On the flap its self they are in the same width location as the pocket snaps and about ½” from the edge

10923666_10155111867065004_7101564272424846602_n 10942490_10155111866895004_8586794504079119721_n 10959796_10155111866475004_2338925996700456650_n 10983428_10155111866595004_5876401989004334802_n

PDF version available for download

Diaper Clutch Bag Tutorial