Today’s project is my first onbu but my 11th diy carrier at this point. I am not a professional seamstress I do no sell my carriers. I have simply combined things I have found in other tutorials or other carriers to make this carrier. I am in no way responsible for the safety of your child while wearing this carrier. Features of this carrier
- Padded to wrap straps
- Leg out padding
- Hood compartment
- Padded protector at waist ring
Most of my directions here are based off this tutorial – from the fine and fair blog http://www.fineandfairblog.com/2013/10/tablecloth-mei-tai-tutorial-with-wrap.html 1. I simply used the printable pattern and assembled as directed… and a 60″x84″ table cloth. I would recommend about 1/2 yard of canvas or duck fabric for this project as well 2. I cut out all of my parts.
- 3 Main body pieces – (1 – canvas or duck fabric – 2 – table cloth fabric )
- 2 straps – 15″ x 70″
- 2 ring loops – 6″ x 8″
- 2 – pieces hood flap (not part of the pattern)
- I traced the top curved edge of the pattern to create this piece. I then added about 3″ from the widest part to create the piece.

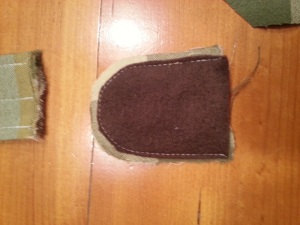
- 4 – pieces to protect you from the rings
- for this i traced the edge of my small sling ring I would then add 1/4″ to 1/2″ the width dimensions to allot for seam allowance. and add about 3″ to the length beyond the size of your sling ring. Mine were a little small this is the size I recommend based on experience. Final dimension should be width- sling ring size + 1/2″ x length sling ring size +3″) you will also want 2 pieces of fleece with the same dimensions
-
- IF making a hood you will want to cut your hood and hood straps I haven’t made mine yet.
- 6 -3.5″ x 12″ pieces of fleece


3. Once all your pieces are cut I then work on all the smaller pieces a) Ring Tie offs for waist – padded flap first
- Layers your materials – 1 layer face up, 1 layer face down, and then a layer of fleece
- Stitch all layers together with an 1/4″ seam allowance
- Trim off excess fleece outside of the seam allowance – this is what it should look like
- Then flip so the fleece is on the inside and top stitch… set aside
- Now Grab your strap to attach the rings to the carrier 6″ x 8″
- I like to iron mine in thirds good side out
- Take the top third and fold it under about 1/2″ then iron down ( I forgot to take a picture of this step
- I then stitch the center seam down with a top stitch
- Top stitch the two long edges.
- Fold in half and place your ring on the strap you have just assembled
- I then Placed the ring with the strap on top of the curved piece you made before
- Sew the two pieces together with 3/4″” seam allowance from the rings then you can set this aside


b. Assemble the Shoulder Straps
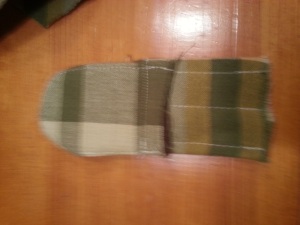
- Gather your straps 15″ x 70″ – I cut mine out of both sides of the table cloth so I only needed to hem one edge
- Iron/Pin a 1/2 in seam – I like to iron 1/2″ fold using the edge of that 1/2″ for my guide then iron again and pin.
- Top Stitch the seam you just ironed – I like to use longer straight stitch for this
- Repeat this step for your second strap

- Stack 3 of your 3.5″ x 12″ pieces of fleece on top of one another
- Zig zag stitch along all 4 sides. I like to run done one long side – then do the other long side running stitches in the same direction. Then I stitch both short ends.
- Repeat this for the other 3 pieces of fleece

- Mark on your strap from raw edge 5″ with a non permanent marker
- Place padding on your strap starting at your mark

- Line up fleece within 1/4″ of the hemmed edge
- Fold strap over fleece pad

- Make sure that the strap edge goes over the fleece so when you stitch you do not see the fleece. With 3.5″ pieces of fleece your hem should be about 3.75″ from the fold Pin in place.
- Stitch the fleece into the strap I started on one short end, then top stiched the hem covering the padding, then along the other short end. you can stitch right on the edge of the fleece.on the short ends.

- Add a few rows of stitching length wise down the padding area I did two rows with an inch between them at the center of the padding
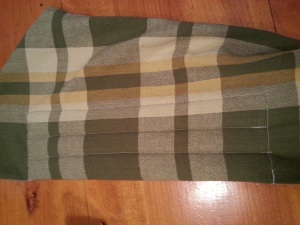
- Fold the remaining wrap strap into two overlapping pleats

- Pin into place and stitch down 1/2″ from the bottom of the padding (toward the raw edge of the strap)


c. Assembling the Body Panel and All Straps 
- pick up your center panel This is the panel you will be attaching all your straps to. (I suggest using a canvas or duck fabric for this layer)
- Using a ruler I mark 1/2″ from each edge where the straps meet the panel and a 1/2″ from both edges of the srap opening
- Start with your waist ring assembly – Lay assembly on top of panel ring side down and padded cover up.
- I used the line to stitch both piece together with as my guide… line up that stitch with your 1/2″ guide line and keep the length of the assembly 1/2″ from he bottom edge of the carrier. Pin into place
- Repeat for the second assembly
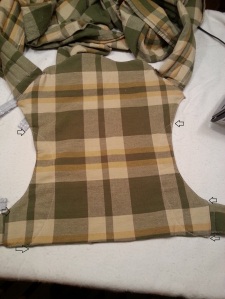
- Lay straps out on panel . Pleats should be under the padding and padding should be toward the inside of your carrier. Please see the above image if that doesn’t make sense.
- I like to make sure I have 1/2″ of free material on each side of the strap when placing my strap. You could also use a ruler to draw the strap angle before putting it into place.
- Use the guide line from tacking down your pleats. Line this up 1/2″ away from the edge of the carrier.Pin into place
- Repeat for the other strap
- Time to do lots of stitching. If it makes it easier for you you can draw your x boxes and stitching lines onto the carrier before you move it to the machine.


- I do a little extra seaming then necessary a better safe then sorry situation. I like to keep all of the strap stitching about 1″ from the outer edge of the carrier to make it easier for later
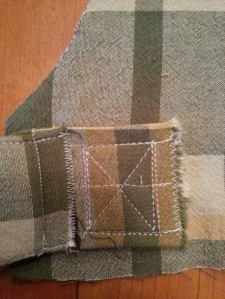
- Waist Straps – I did about a 1.5″ x box I used a triple straight stitch for my x box. I did a zig zag stitch to secure the spot where the twp pieces meet yours will be in a different spot because I gave you better dimensions then I made with my own. I also did a zig zag stitch to finish off the raw ends of the fabric. (see the middle image above) Repeat for the second Waist strap
- Shoulder Straps – Sew an X box stitch mine is about 1.5″ tall using my triple stitch again, About 1/2″ down from the x-box I sewed a straight triple stitch then sewed over that with a zig zag stitch, Then finish off the raw fabric again with a zig zag stitch. See picture on the right. Then repeat for the second strap.


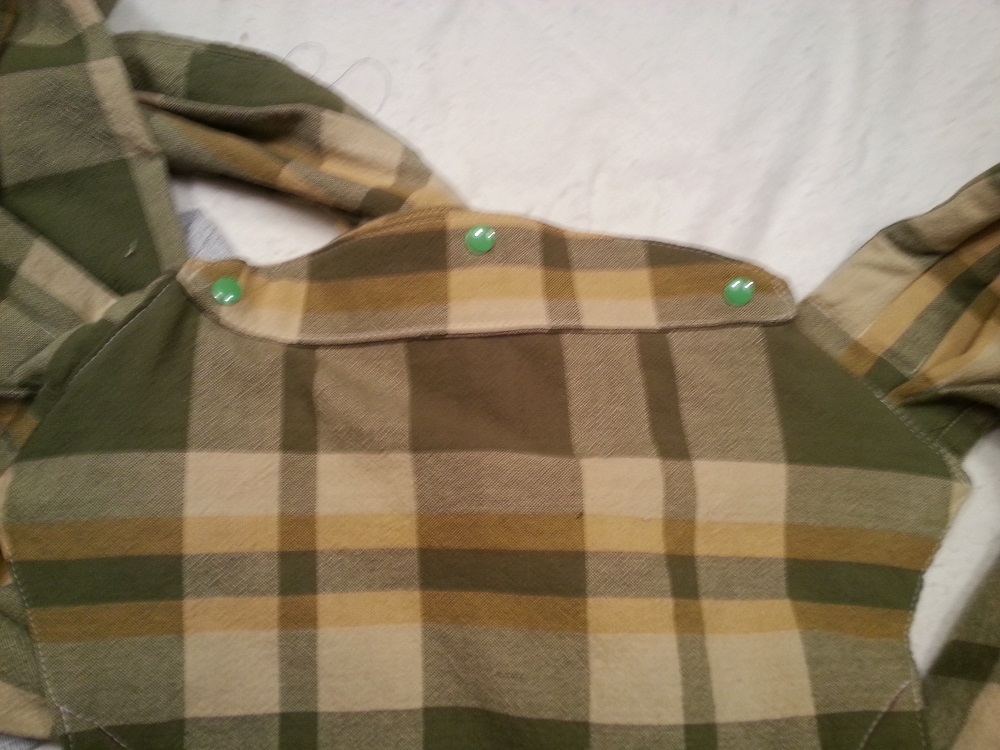
d. Hood Flap
- Place both pieces together right side to right side
- Stitch using a 1/2″ seam allowance all the way around leaving a big enough space on the flat edge to get your hand inside.
- Turn the fabric tube so stitching is now on the inside.
- Top stitch along the two short side and also the curved side
- IF you want to hide your kam snaps now would be the time to hide them.
- Mark 3 locations for KAM snaps (right left center) I like to put mine in at least 1/2 from the edge
- Note I did not hide mine so this is what it looks like stitched onto the carrier below

- Use an awl to poke a hole through one side of the fabric.
- Insert the pin for the Kam snap into the fabric and and assemble cam snap as normal I put the male side of my snaps on this piece and the female on the panel itself.
- Top stitch the remaining side closed.
- Grab your carrier panel that will go against baby
- Line up Hood flap 1/2″ from the top edge of the panel. (I Apologize I did not take a photo of this step)
- Pin into place
- Sew to panel by stitching along the long flat edge only.
- Flip flap down and pin to panel so you don’t accidentally sew it down later
- Will look like the below picture but not with the rest of the carrier


d. Assembling all the body layers
- Lay Inner Panel down on table with straps on top
- Lay outer panel on top face up
- Lay inner panel with hoop flap on top face down
- pin into place make sure you have all three layers lined up
- Using your ruler again mark 1/2″ from the edge where all your straps attach
- Stitch with 1/2″ seam allowance around all 4 sides. Leave about a 6″ opening in the base of the carrier to turn fabric later. Stop stitching 1/2″ from strap and resume 1/2″ after strap as you go around

- Turn the carrier inside right. I like to start by moving my straps to the inside of the envelope through the strap opening. You want to insert then through your two exterior layers. Once the shoulder straps have been flipped I simply pull both straps through the bottom opening and the remaining carrier follows it right out.
- Once carrier is turned pull the remaining straps through the strap openings to ensure all straps are now on the outside of the turned fabric.
- Press all your seams with an iron When you get to where the straps meet the carrier I like to draw a line 1/2″ from the edge on both side so I know exactly at what point to fold the fabric over so it lines up for top stitching. I fold the inner layer right over at the stitching as well (sorry I did not take a picture of this)

e. Leg out padding
- Hand draw a curved line from about 2/3 of the way up the panel to the bottom of the carrier (in hindsight i would old do it to about 1/2″ from the top of your waist straps)
- Use a long straight stitch to stitch along your curved line make sure to leave an opening at the bottom to fill with padding.
- Then top stitch around the outside from the top of the waist band to the top of the waist band (this gives you the option to fill your leg out padding from the waist band or your 6″ opening which ever you prefer. ( do not flip up the hood flap yet so you don’t accidentally sew it shut.
- Fill your leg out padding ( I like to use small clumps at a time and use a pencil to help guide it to the top of the leg out padding ) I made mine med to firm as far as fullness goes. If you went all the way to the bottom of the carrier like i did you will need to fill from the waist strap opening and if you did not you have the option of filling from the bottom opening or the waist strap opening.
- If you did not run leg out paddingto the bottom of the carrier sew a closing line of stitches 1/2″ above the waist strap . If like me you ran your leg out padding to the bottom of the carrier top stitch from the existing top stitch above the waist strap to the corner and to the end of the leg out padding. I like to leave a little big of wiggle room in my padding so i can shove it inside to make sewing easy the work it back out afterwards.

f. Finishing off the carrier.
- Remove pins from hood flap.
- Using the Kam snaps already attached line up where you need to put the other half of the snap.
- Using your awl poke a hole through the inner layer ( you could go through all three if you want to see the snaps heads on the outside of the carrier but I did not.
- Attach Kam Snaps
- Repeat for all three snaps.

- Once cam snaps are attached stitch the sides of hood flap to the carrier. (you can see the stitching in the above image)
- Once your Kam snaps are inserted Top stitch close the remaining portion of the bottom edge of your carrier between the waist straps.
- At this point you can quilt your waist band for decoration or added strength.
- If not you are all DONE.

Carrier Laid Flat Front of carrier  Showing Straps through rings Front of carrier
  Showing Straps through rings inside of carrier
  Action Shots


 Hope you all enjoyed this tutorial. I can’t wait to see all your creations.

Padded straps that can also cup the shoulder like wrap straps? I am intrigued!!! I need to get started on mine today.
LikeLike
I love these straps for in a front carry or for distributing the pressure while in a back carry 🙂 Can’t wait to see your creation
LikeLike
I ended up cutting my loops on the wrong spot of fabric and had only 11.25in width per strap. I kicked myself but came up with my own padded wrap strap. I wrote up a tutorial on my blog today (shared it in onbu love and bw diy groups as well).
LikeLiked by 1 person
hi. would you mind sharing your pattern? ive looked into fine and fair but yours is more contour, just exactly how i planned it.. thank you so much.. would appreciate your consideration
LikeLike
I almost always start with fine and fair and just tweek it as needed. I can mark dimensions on an image of my carrier if that would help for you
LikeLike
[…] (that hides the x boxes as well as makes it suitable for other outer fabrics). Fine and Faire Crafty Cin Cin Becoming Mamas Nico […]
LikeLike
Reblogged this on Mermaid Mama Designs and commented:
Love the idea of making your own. Talk about getting exactly what you need! 🙂
LikeLike